
Yesterday’s post gave me an idea for a new Friday posting theme: Photoshop Friday. I’ll mix in with Friday Flashbacks and Fashion Fridays.
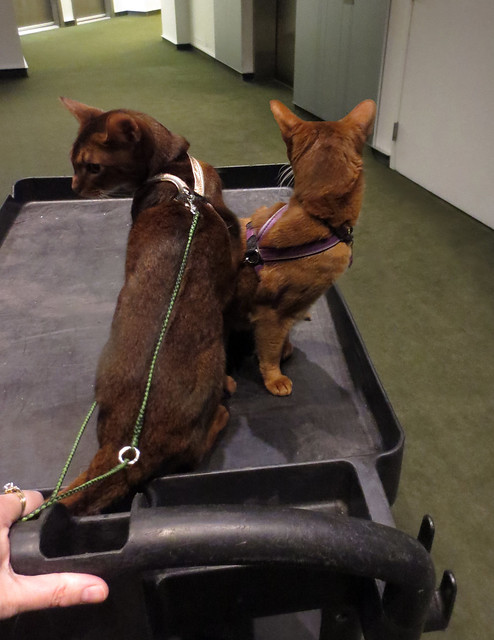
So here is another photo of Jacoby and Angel riding on the cart. A lot of people ask me how I always manage to get them to pose so nicely. Well, the answer is, I don’t always get them to pose nicely. I take a lot of photos (and always have…you should have seen how much I spent on film back in the day!) and then end up deleting about half of them.
But sometimes, you get a situation like I had with several of the photos of Jake and Angel on the wagon, where one cat looked great and the other one moved their head just as the shutter went off.

As you can see, in this photo Jake looks pretty good, but Angel moved and, in the low light of the elevator lobby, she’s blurry.

And then in this photo, Angel looks great…but now Jake’s the blurry one.
So there’s two half-crappy photos. Combined, they’d make one pretty good photo. Which is what I did. Basically, I just put Angel’s good photo over her bad one, blended out the background and flattened the image down.

First, I copied a section of the background (the one where Jake is good and Angel is blurry). Using the cloning stamp (aka the “rubber stamp” since that’s what it looks like), I covered Angel up with the background carpet pattern.

Then I selected the good Angel and part of her background from the other photo and pasted it onto a new layer.

I also made a copy of the elevator and hallway background from the original photo and saved it to a second layer.

Finally, I made an extra copy of Angel’s foot and shadow, and put those on a third layer.

Going back to the Angel layer, I used a soft brush eraser to erase some of the background. I actually do the erasing with the background layer visible, so that I can see what I’m doing, but I’ve hidden it here so you can see the working layer clearly.

Using the rubber stamp, I removed Angel’s head from the hallway background layer, so that it became a clean background with only the walls around the elevator.

I erased the edges of the paw-and-shadow layer so that they blended into the background.

Once I’d gotten the three layers looking the way I wanted them to, I put them together. This is the Angel layer.

Now, with the Jake background layer turned on and the Angel layer placed over top, you can’t really tell that this was two lousy photos anymore. Well, you probably could if you blew it up to 800% and analysed the pixels. I didn’t really spend a lot of time on this, maybe 20 minutes, so it’s not a perfect job by any means…but it’s good enough!
